
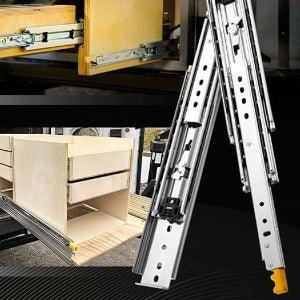
In industrial settings, tool boxes, and heavy furniture, heavy-duty drawer slides are essential for supporting tremendous weight and ensuring smooth operation. When it’s time to remove these sturdy slides for maintenance, replacement, or repair, the process can seem daunting. However, with the right method and understanding, you can remove heavy-duty drawer slides efficiently and safely. This guide will detail the methods for removing heavy-duty drawer slides.
Step-by-step guide to removing heavy-duty drawer slides:
- Empty the drawer
Remove all items from the drawer to reduce weight and prevent any items from falling out during removal. This step makes operating the drawer easier and safer.
- Fully extend the drawer
Pull the drawer as far as it will go. Many heavy-duty drawer slides have release levers or tabs that allow the drawer to extend further, disengaging the locking mechanism.
- Identify the release mechanism
Locate the release mechanism on the heavy-duty drawer slide. This mechanism can be a lever, tab, or clip on the side of the slide. Use a flashlight to see clearly if necessary.
- Separate the drawer from the heavy-duty slide
Simultaneously press the release levers or tabs on both sides of the drawer while gently pulling the drawer out. This step may require coordination and the help of a second person, especially for heavier drawers.
- Remove the Drawer
After releasing the release mechanism, carefully pull the drawer completely out. Place the drawer in a safe area to prevent damage or injury.
- Unscrew the Slides
Using a screwdriver or electric drill, remove the screws that secure the heavy-duty drawer slides to the cabinet or frame. Collect the screws in a container to avoid losing them.
- Remove the Slides
Once unscrewed, gently remove the heavy-duty drawer slides from the cabinet or frame. If the slides are stuck, gently wiggle them to loosen. Be careful of sharp edges or any remaining debris.
- Inspect and Clean
Inspect the area where the slides are attached for any signs of damage or wear. Clean the surface to remove dust, dirt, and debris, ensuring a smooth surface for reattaching the new heavy-duty slides.
Tips for a Smooth Removal Process:
-Label the Parts: If working with multiple drawers or complex hardware, label each part to simplify reassembly.
-Working Method: Perform each step carefully to avoid damaging the heavy-duty drawer slides or furniture.
-Get help when needed: For particularly heavy or large drawers, ask for help to prevent injuries or accidents.
Other Considerations
Choosing the Right Replacement Slides When replacing heavy-duty drawer slides, make sure you choose the right type and size for your application. Heavy-duty drawer slides are available in a variety of lengths, weights, and materials. Match the specifications to your needs for optimal performance.
Maintaining Heavy-Duty Drawer Slides
Regular maintenance of heavy-duty drawer slides can extend their lifespan. Keep the slides clean, lubricate them regularly, and inspect them for any signs of wear or damage. Addressing these issues promptly can prevent more significant problems in the future.
Installing New Heavy-Duty Drawer Slides
After removing the old slides and preparing the area, follow the manufacturer's instructions to install the new heavy-duty drawer slides. Make sure they are securely fastened and properly aligned for smooth operation.
Conclusion
Removing heavy-duty drawer slides may seem challenging, but with the right tools and a systematic approach, you can complete the task efficiently. By following this step-by-step guide, you will be able to safely and effectively remove heavy-duty drawer slides, whether for maintenance, replacement, or repair. Remember to handle each component carefully, keep track of all screws and parts, and ask for help when necessary. With these tips, you will ensure a smooth and successful removal. Happy DIY!
